Controllers & Routing
Controllers handle incoming HTTP requests and determine the appropriate response, while routing maps
incoming URLs to specific controller methods. For example, the URL /user/view doesn't
directly correspond to a physical file; instead, the routing mechanism directs the request to the correct
controller.
Controllers and routing are fundamental concepts in web application development. They form the backbone of your application, managing the flow of requests and responses. Fuwafuwa Framework provides a simple, intuitive routing system that automatically maps URLs to controller actions, making it easy to build clean, maintainable applications.
In Fuwafuwa, controllers act as the intermediaries between your application's models and views. They process requests, retrieve data from models, and pass it to views for rendering. The routing system takes care of matching URLs to the appropriate controller actions, freeing you from having to manually configure complex routing tables.
Routing
Routing is the process of mapping incoming URLs to specific controller methods. In Fuwafuwa Framework, this process is automatic and intuitive, following a set of simple rules that make it easy to build clean, predictable URLs.
Unlike some other frameworks that require you to manually define every route, Fuwafuwa uses a convention-based routing system. This means that the structure of your controllers and views directly determines the URLs for your application, reducing the amount of configuration you need to do.
Fuwafuwa Framework uses the following steps to determine the appropriate handler for a given request:
- Path Decomposition: The incoming URL is split into two parts: the class name
and the action method. The last segment of the URL becomes the action, and the remaining part forms
the class name. For instance,
/user/admin/addwould result in theUser\Adminclass and theaddaction. - Controller Search: The framework looks for a matching controller class in the
app/controllersdirectory. If found, the corresponding method is executed. - View Search: If no matching controller is found, the framework searches for a
view file with the same name as the URL (e.g.,
user/admin/add.html) in the app/views directory. If found, the\Fuwafuwa\Controller\Viewcontroller is implicitly created to render the view. - 404 Error: If neither a controller nor a view is found, a 404 error is returned.
Controllers Folder
Controllers are PHP classes typically located in the app/controllers directory. Fuwafuwa
Framework employs a dual-root structure with system and user subfolders. The system folder contains core
framework controllers and utilities, while the user folder is reserved for custom application controllers.
The framework prioritizes controllers in the user folder over those in the system folder. When a
request arrives, the search for a matching controller begins in app/controllers/user, followed
by app/controllers/system. If no controller is found, the search continues in the views folder.
Views Folder
Similar to the controllers folder, the views folder uses a triple-root structure: system, themes, and user. This organization allows for system updates without overwriting custom views. To customize system or theme views, it's recommended to copy the desired files to the user folder and make modifications there.
Controllers
Controllers are the workhorses of your Fuwafuwa application. They are responsible for handling incoming HTTP requests, processing them, and generating appropriate responses. Controllers act as the intermediary between your application's models (which handle data) and views (which display data to users).
In Fuwafuwa, controllers are simple PHP classes that follow a few basic conventions. They don't require you to extend any specific base class (though you can if you want to), and they don't have complex configuration requirements. This simplicity makes them easy to create and maintain.
A controller is a PHP class responsible for handling incoming HTTP requests and generating responses.
It typically implements the \Fuwafuwa\Controller interface or defines an execute
method.
class Example implements \Fuwafuwa\Controller {
    function execute(\Base $f3, string $action = ""){
        print "Hello";
    }
};
Authentication

Authentication is the process of verifying the identity of a user. Fuwafuwa Framework provides a built-in authentication system that makes it easy to add login and logout functionality to your application.
The default authentication mechanism in Fuwafuwa is implemented in
app/controllers/user/model/user.php and validates user credentials against the
user table. This system is flexible and can be easily extended or replaced to meet your
specific authentication needs.
Fuwafuwa's authentication system supports common features like remember me functionality, password reset, and login attempts tracking. It also integrates seamlessly with the framework's authorization system, allowing you to control access to different parts of your application based on user roles and permissions.
Custom Authentication
To implement custom authentication logic, create a class that extends the default authentication class and overrides the login method. The login method should return an array with the following structure:
[
    'authed' => true, // or false if invalid login
    'user' => [ // will be put in SESSION
        'username' => $user['login'],
        'fullname' => $user['fullname'],
        'group' => $user['role']
    ]
];
To register your custom authentication class, set the auth_class key in the APP section
of the app/configs/config.ini file.
Authorization
Authorization is the process of determining what a user is allowed to do after they've been authenticated. Fuwafuwa Framework uses Role-Based Access Control (RBAC) for authorization, which is a widely adopted approach that simplifies managing user permissions.
In RBAC, permissions are assigned to roles, and users are assigned to one or more roles. This makes it easy to manage permissions for large numbers of users, as you only need to update the role definitions rather than individual user permissions.
Fuwafuwa's authorization system is configured using a single JSON file: app/configs/rbac_permission.json.
Access control decisions are based on the user[group] value stored in the session after successful authentication.
rbac_permission.json
This file combines global settings and permission definitions in a structured JSON format:
{
"global": {
"superuser": ["admin"],
"supergroup": ["admin"],
"superuser_deny": ["member.all"],
"guest_allow": [
"guest.misc",
"guest.common",
"user.login",
"page.view",
"post.view"
],
"guest_deny": ["page.edit", "post.edit"],
"authed_allow": ["member.all"],
"authed_deny": ["member.register"]
},
"permissions": {
"user": {
"list": {
"label": "List Users",
"paths": ["/admin/user", "/ajax/user/list"]
},
"edit": {
"label": "Edit User",
"paths": ["/ajax/user/edit"]
},
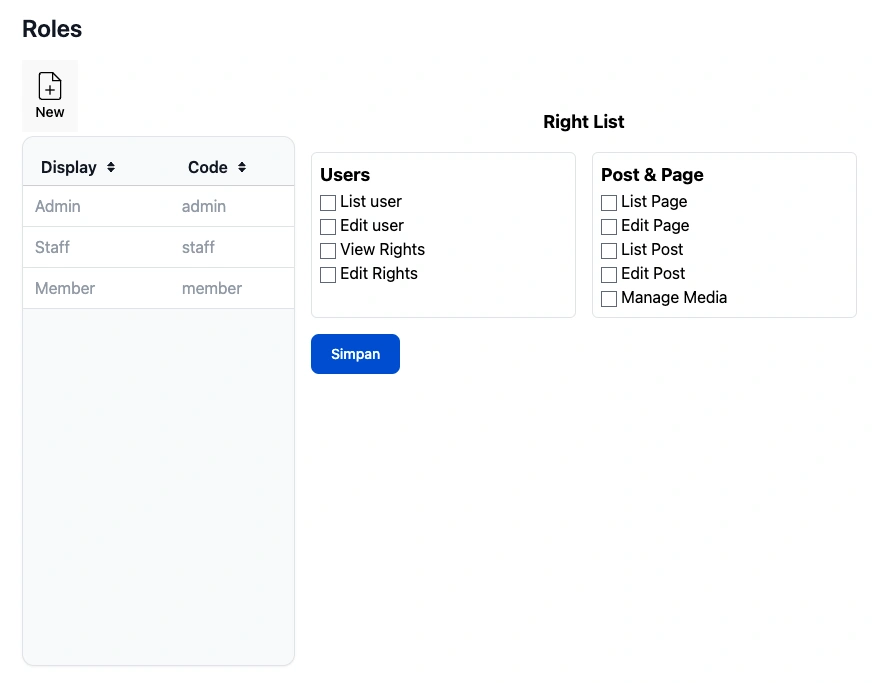
"view_roles": {
"label": "{{ t('role.view_rights') }}",
"paths": ["/admin/roles", "/ajax/user/roles"]
}
},
"post": {
"view": {
"label": "View Posts",
"paths": ["/post/*"]
},
"edit": {
"label": "Edit Posts",
"paths": ["/post/edit", "/ajax/content/post*"]
}
}
}
}Global Settings
The global section defines system-wide access control rules:
- superuser: Array of usernames with full system access (except denied permissions).
- supergroup: Array of group names with full system access (except denied permissions).
- superuser_deny: Array of permissions that even superusers cannot access.
- guest_allow: Array of permissions granted to unauthenticated users.
- guest_deny: Array of permissions explicitly denied to unauthenticated users.
- authed_allow: Array of permissions granted to all authenticated users.
- authed_deny: Array of permissions explicitly denied to authenticated users.
Permissions Configuration
The permissions section defines all available permissions with their labels and accessible paths:
- Section Key: The permission category (e.g.,
user,post). - Action Key: The specific action (e.g.,
list,edit). - label: Human-readable description shown in the role editor (supports template syntax).
- paths: Array of URL patterns that this permission grants access to. Wildcards (*) are supported.
RBAC Helper Functions
Fuwafuwa provides several helper functions for working with RBAC configuration:
rbac_config()
Loads and returns the complete RBAC configuration from the JSON file. Results are cached for performance.
$config = rbac_config();
// Returns: ['global' => [...], 'permissions' => [...]]
rbac_global()
Returns only the global settings section of the RBAC configuration.
$global = rbac_global();
// Returns: ['superuser' => ['admin'], 'supergroup' => ['admin'], ...]
rbac_permissions()
Returns all permissions configuration.
$permissions = rbac_permissions();
// Returns: ['user' => [...], 'post' => [...], ...]
rbac_permission_detail()
Gets detailed information about a specific permission including its label and paths.
$detail = rbac_permission_detail('user', 'list');
// Returns: ['label' => 'List Users', 'paths' => ['/admin/user', '/ajax/user/list']]
rbac_permission_paths()
Returns just the path patterns for a specific permission.
$paths = rbac_permission_paths('user', 'edit');
// Returns: ['/ajax/user/edit']
rbac_permission()
The main function for checking user permissions. It evaluates the user's group and permissions against the configured access rules.
// Check if current user has access to a specific section
$hasAccess = rbac_permission($username, $group, $permissions, 'user.list');

// Check if current user has access to current path
$hasAccess = rbac_permission($username, $group, $permissions);- The configuration is cached for 1 hour (3600 seconds) for optimal performance.
- You can override the configuration at runtime by setting
RBAC_PERMISSIONin the F3 hive. - Wildcard patterns in paths use regex matching (e.g.,
/post/*matches/post/edit,/post/123). - For testing, you can use a custom configuration file by setting
$f3->set('RBAC_PERMISSION', $customConfig).
If you are upgrading from an older version that used rbac.ini and permissions.ini,
a migration script is available at scripts/migrate_rbac_to_json.php to convert your existing
configuration to the new JSON format.
Model & SQL
Fuwafuwa Framework provides a powerful BaseModel class to simplify database interactions.
This class handles common CRUD (Create, Read, Update, Delete) operations and offers additional features
for data retrieval and manipulation, making it easy to work with databases without writing complex SQL
queries.
The BaseModel class abstracts away the complexity of database operations, providing a clean,
object-oriented interface for working with data. This allows you to focus on your application's business
logic rather than the details of how to interact with the database.
However, Fuwafuwa also provides access to raw SQL queries for situations where you need more control over your database operations. This flexibility allows you to handle complex queries that might not be easily expressed using the built-in model methods.
<?php

namespace Model;

class User extends \Fuwafuwa\BaseModel {

    function __construct(\Fuwafuwa\Db $db) {
        parent::__construct($db, 'user', [
            'ai_field' => 'id',
            'created_field' => 'created',
            'modified_field' => 'updated',
            'deleted_field' => 'deleted',
        ]);
    }
}
Data Retrieval
To retrieve data from the database, you can use either the retrieve method or the original
load method inherited from the F3 framework.
$user = m(\Model\User::class);
$user->load(['login = ?', 'admin']);
if($user->loaded()) {
    print $user->fullname;
    // or
    print $user['fullname'];
} else {
    print "user not found";
}
Data Manipulation
Updating Records
After a record is successfully loaded, we can modify the data:
$user = m(\Model\User::class);
$user->load(['login = ?', 'admin']);
if($user->loaded()) {
    $user->fullname = 'Super Admin';
    $user->save();
} else {
    print "user not found";
}
Inserting New Records
$user = m(\Model\User::class);
$user->login = 'user';
$user->fullname = 'User';
$user->save();
Raw SQL Queries
For complex queries that require joins or custom SQL logic, you can use the SQL trait:
use \Fuwafuwa\Traits\SQL;

function user_count() {
    $count = $this->SQL('SELECT COUNT(1) FROM user')[0][0];
    // or
    $count = $this->FSQL1('SELECT COUNT(1) FROM user');
}
Ajax Interactions
Ajax (Asynchronous JavaScript and XML) is a technique for creating fast, dynamic web pages. It allows
you to update parts of a web page without reloading the entire page. Fuwafuwa Framework simplifies Ajax
interactions by providing a dedicated \Fuwafuwa\Controller\Ajax class that handles many of
the complexities of asynchronous communication.
The \Fuwafuwa\Controller\Ajax class provides a simple interface for handling Ajax requests,
automatically parsing incoming data, and preparing responses in JSON format. This makes it easy to add
dynamic features to your application, such as real-time updates, form validation, and interactive UI
elements.
This section explores utilizing the \Fuwafuwa\Controller\Ajax class and its
functionalities.
Server-Side with \Fuwafuwa\Controller\Ajax
- Extending the Ajax Class: Create a class that extends \Fuwafuwa\Controller\Ajax. This establishes the foundation for your Ajax controller.
- Handling Requests: Define methods within your Ajax controller class to handle specific Ajax requests. These methods typically receive the F3 framework instance as an argument ($f3).
- Accessing Data: Fuwafuwa Framework automatically parses the request body (if it's a POST request) and provides the data as an array in the $data property of your controller. You can also access query parameters using standard F3 techniques.
- Processing and Returning Data: Inside your Ajax controller method, process the received data, perform any necessary operations (e.g., database interactions), and prepare a response. The sendJson method provided by the Ajax class simplifies sending JSON responses to the client.
<?php

namespace Ajax;

class Test extends \Fuwafuwa\Controller\Ajax {
    use \Fuwafuwa\Traits\Content;

    function country($f3) {
        // Access query parameter 'q'
        $q = $this->data['q'];

        // Process and filter countries data
        $countries = array_column(json_decode($this->json, true), 'name');
        $result = $this->filterCountries($countries, $q);

        // Send JSON response
        $this->sendJson($result);
    }

    private function filterCountries($countries, $q) {
        if ($q) {
            // Filter countries based on query string
            return array_values(array_filter($countries, fn($e) => stripos($e, $q) !== false));
        } else {
            // Return a subset of countries if no query is provided
            return array_values(array_slice($countries, 0, 10));
        }
    }
}
Client-Side JavaScript
Fuwafuwa Framework might not offer built-in JavaScript methods for Ajax requests, but here's a general approach:
- Fetch Data: Use the fetch API or a suitable library to make Ajax requests to your server-side Ajax controller endpoints.
- Process Response: Parse the JSON response received from the server.
- Handle Success/Error: Implement logic to display success notifications (e.g., popups) or error messages based on the response data.
save() {
    this.data['content'] = tinymce.get('content').getContent();
    fetchData('{{@BASE}}/ajax/content/post-edit', { data: this.data, oper: this.data.id ? 'edit' : 'add' }).then(data =>
        popupInfo('Post sudah disimpan')
    ).catch(e => popupError(e));
}
API
Fuwafuwa Framework simplifies the creation of APIs (Application Programming Interfaces) through its
\Fuwafuwa\Controller\Api base class. This class provides a foundation for building robust,
secure API endpoints with essential functionalities.
APIs are essential for modern web applications, allowing different systems and applications to communicate with each other. Fuwafuwa's API controller class provides features like automatic data parsing, JSON response handling, and built-in authentication support, making it easy to create APIs that follow best practices.
Whether you're building a simple API for your own application or a public API for third-party developers, Fuwafuwa's API controller provides the tools you need to get started quickly.
Core Features
- Simplified Response Handling: The sendJson method conveniently formats and sends JSON responses.
- Automatic Data Parsing: Incoming request data is automatically parsed and made accessible
through the
$dataproperty. - Bearer Token Authentication: Built-in support for Bearer Token authentication, ensuring secure API access.
Creating an API Endpoint
To create an API endpoint, follow these steps:
- Create an API Controller: Extend the \Fuwafuwa\Controller\Api class and define methods for your API endpoints.
- Define API Logic: Implement the desired logic within your controller methods.
- Return JSON Response: Utilize the sendJson method to send JSON-formatted data as the API response.
<?php

namespace Api;

class Common extends \Fuwafuwa\Controller\Api {

    use \Fuwafuwa\Traits\Content;

    function register(\Base $f3): void {
        $this->sendJson(c(\Fuwafuwa\Service\Member::class)->register($this->data));
    }

    function activation(\Base $f3): void {
        $this->sendJson(c(\Fuwafuwa\Service\Member::class)->activate($this->data));
    }
}
CLI (Command-Line Interface)
Fuwafuwa Framework provides a CLI (Command-Line Interface) component for executing tasks directly from the command line. This is particularly useful for automating processes, running scripts, or performing administrative tasks that don't require a web interface.
The CLI component allows you to create custom commands that can be run from the terminal. This is perfect for tasks like database migrations, data imports/exports, cache clearing, and other maintenance operations.
Fuwafuwa's CLI system is simple to use and follows the same conventions as the rest of the framework. You can create CLI commands that interact with your application's models and services, making it easy to reuse existing code.
Creating CLI Commands
To create a CLI command, extend the \Fuwafuwa\Controller\Cli class and define public methods within your class. These methods will become available as CLI commands.
class MyCommand extends \Fuwafuwa\Controller\Cli implements \Fuwafuwa\Controller\Controller {

    /**
     * List available commands.
     *
     * @param \Base $f3
     * @return void
     */
    function list(\Base $f3): void {
        $methods = get_class_methods(self::class);
        $methods = array_filter($methods, function ($m) {
            $ref = new \ReflectionMethod(self::class, $m);
            return $ref->isPublic();
        });
        array_splice($methods, 0, 5);
        print join("\n", $methods);
    }
}
Executing CLI Commands
To execute a CLI command, run the following command from your project's root directory:
php index.php <controller_name>/<method_name> [arguments]php index.php cli/codegenerator/model --name=User --table=usersThis will execute the model method within the CodeGenerator CLI class.
Command-Line Arguments
CLI commands can accept arguments using the $f3['GET'] variable. Arguments are passed in
--option=value format. Example:
php index.php cli/codegenerator/model --name=Product --table=products --validations=trueIn this example, --name=Product, --table=products, and --validations=true are passed as
arguments and can be accessed in the CodeGenerator class using $f3['GET']['name'],
$f3['GET']['table'], and $f3['GET']['validations'].
See the Code Generator documentation for all available commands including CRUD generation.